In this SAP SuccessFactors tutorial, you will learn: –
- How to create and manager permission roles
- How to assign permission groups to permission roles
- How to activate created permission roles in SuccessFactors.
How to Create Permission Roles in SAP SuccessFactors
To create a permission roles, follow the navigation method:
Navigation: Admin Centre -> Set User Permissions -> Manage Permission Roles.
Step 1: From Admin Centre home page screen, click on the Set User Permissions.

Step 2: Now click on the option ” Manage Permission Roles“.

Step 3: From the Permission Role List Screen, click on create new option to create new permission roles in SAP SuccessFactors as per an organization requirements.

Step 4: On the permission role details screen, enter the following details.
- Role Name: Enter the name of permission role.
- Description: Enter descriptive text for the given permission role.

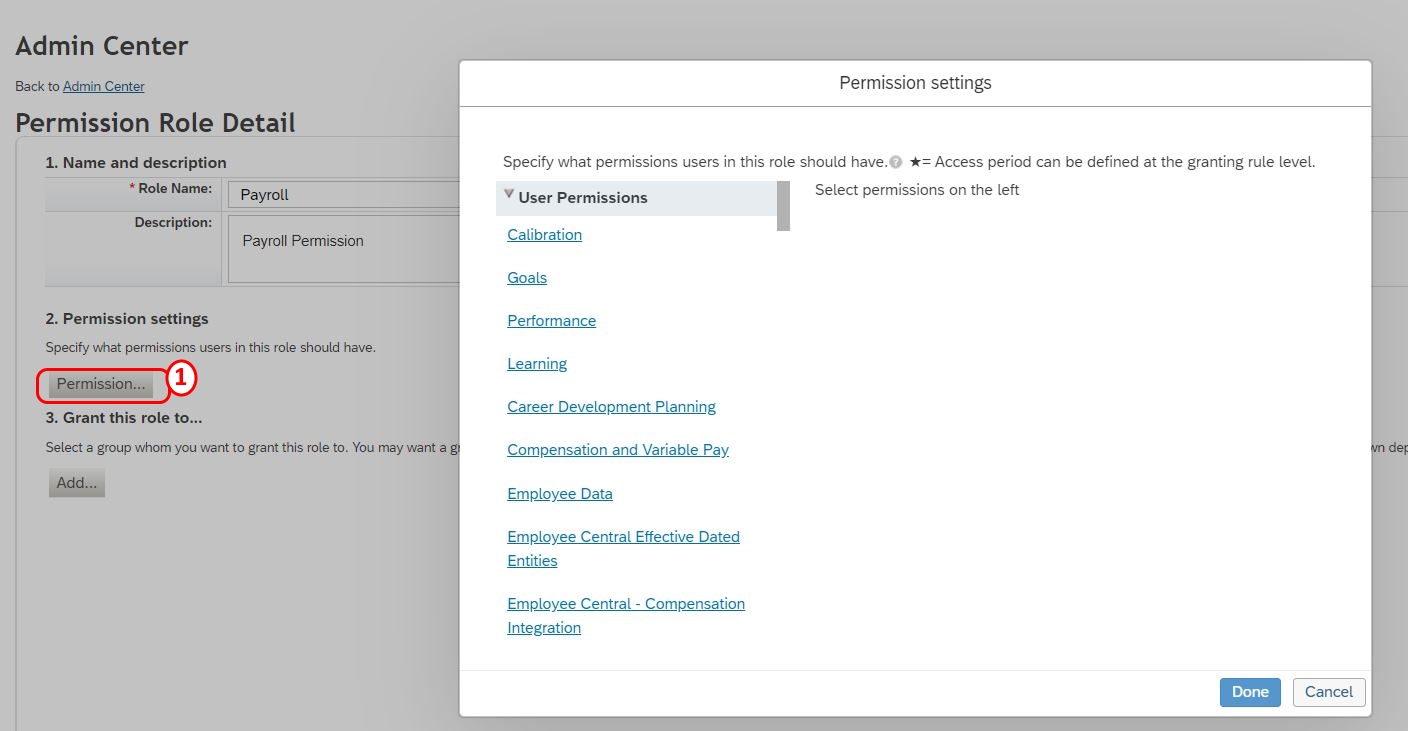
Step 5: Under permission setting options, click on the permission option to access the permission settings page.

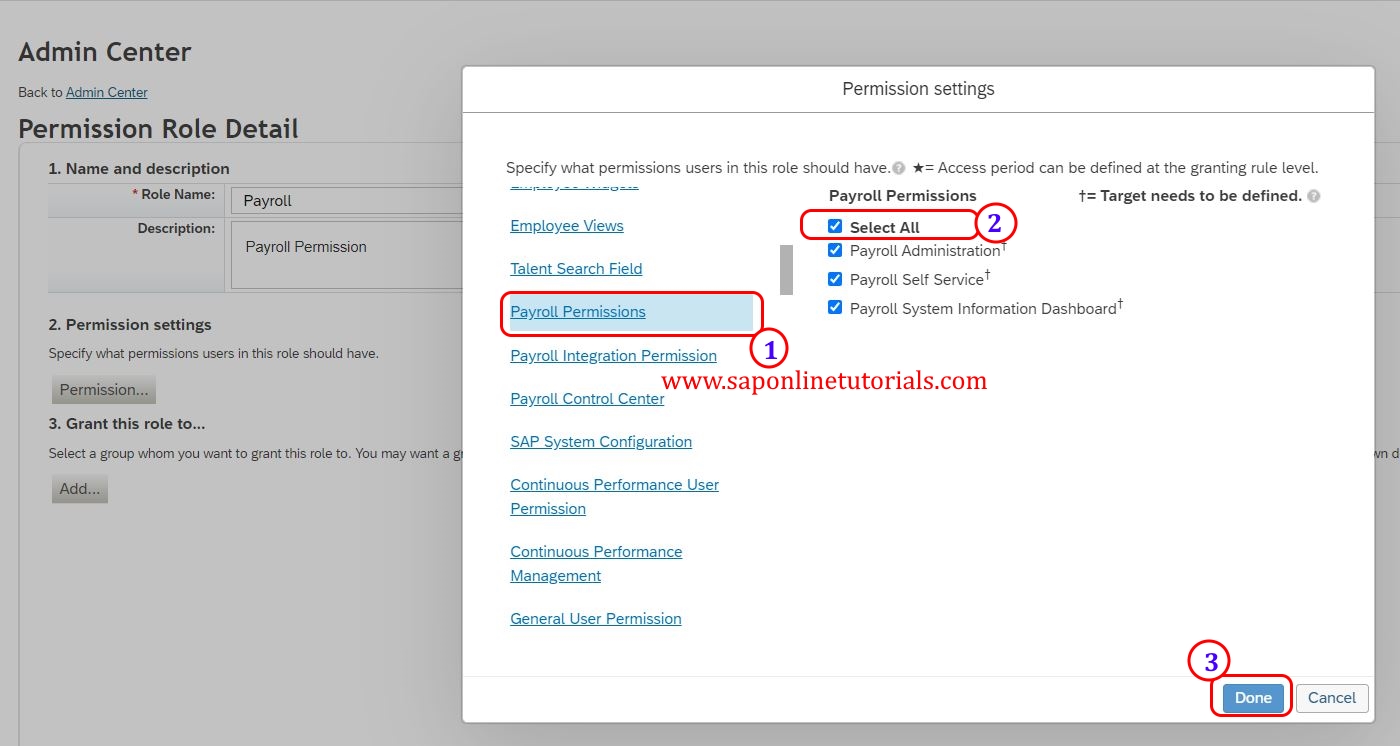
Under user permissions – Choose the required administration permission and select all the permission listed ad per the requirements.
After assignment of permissions, click on done option to save the details

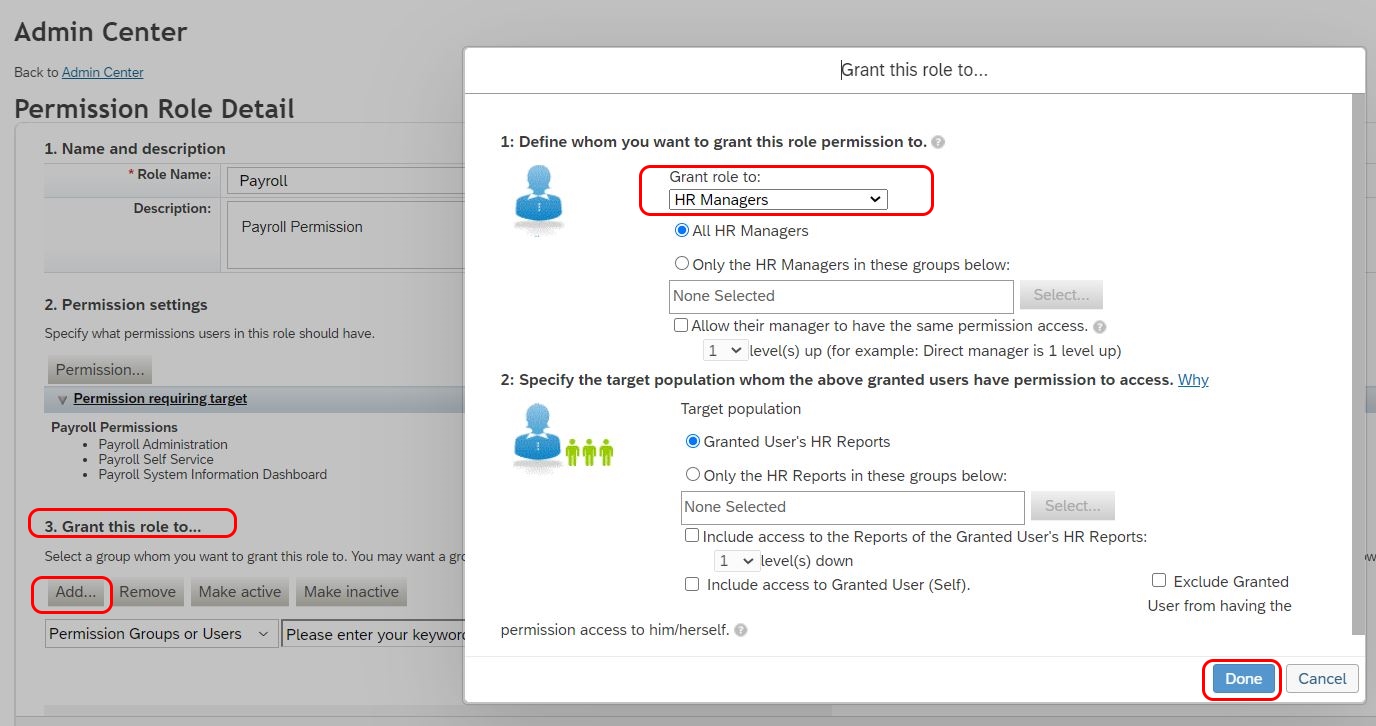
Step 6: Now the permission roles need to assign to the appropriate permission group as per organizational requirements. Under the Grant this role to.. option, click on Add option for assignment of role to the permission groups in SAP SuccessFactors.

Step 7: After successfully maintain the permission roles and assignment of permission groups to permission roles. you need to activate the newly created permission roles.
Click on the option “Make activate” to activate the permission role.

After maintain all the details, click on save changes button and save the details in SAP SuccessFactors.