When you create a customer master data in SAP, the system automatically assigns a number to the master data. The customer number specifies a business to identify the customer and provides with the complete details, including address details, payment details, partner functions, and so on.
- The number ranges are maintained with a number range interval from & to number.
- You can maintain it as Internal or External. It is recommended to maintain it as Internal, so the system automatically assigns the number to the master data
- When maintained as External, you will need to provide the number manually
- After you define the number range, you need to assign to a customer account group.
Note: You need to gather the requirements from the business. What are the number range intervals to be maintained in the system?
How to Create Number Ranges for Customer Accounts in SAP
This tutorial guides you on how to maintain Number Ranges for Customer Accounts in the SAP system.
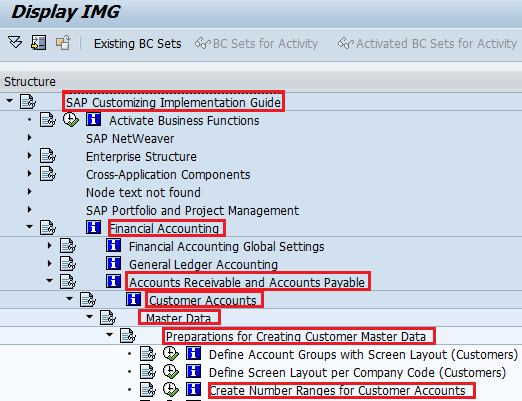
- IMG Menu Path:- IMG > Finance Accounting –> Accounts Receivable and Accounts Payable –> Customer Accounts –> Master Data –> Preparation for creating customer master data –> Create Number Ranges for Customer Accounts
- Transaction Code:- XDN1
In our previous step, Customer Account Groups, we have maintained the following account groups and now we can maintain the number ranges and assign to the account groups.
- A001 – Domestic Customers
- A002 – Sold To Party (SP)
- A003 – Ship To Party (SH)
- A004 – Bill To Party (BP)
- A005 – Payer (PY)
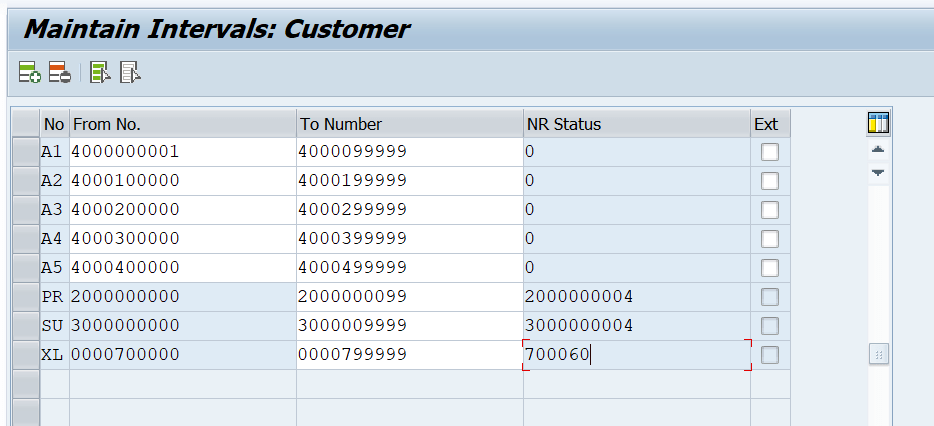
As per the requirement, we are maintaining the following number ranges for customer accounts
| No | From Number | To Number | EXT |
| A1 | 4000000001 | 4000099999 | |
| A2 | 4000100000 | 4000199999 | |
| A3 | 4000200000 | 4000299999 | |
| A4 | 4000300000 | 4000399999 | |
| A5 | 4000400000 | 4000499999 |
Step 1:– Enter Transaction code SPRO in the SAP command field and press enter from the Keyboard.
Step 2 : Select SAP Reference IMG
Step 3: Follow the IMG Menu Path
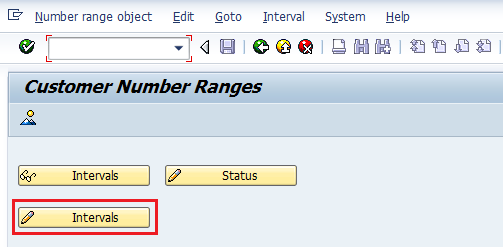
Step 4: Select Change interval for creating number ranges for customer accounts

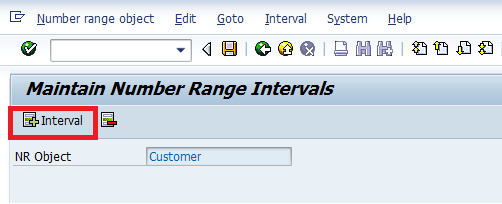
Step 5: Select “Insert Interval“
Step 6:- Update the following information and Enter
1. NO: Enter the NO that you want to identify the Customer account’s number range
2. From Number:- Enter from a number of Customer number range interval.
3. To number: Enter the number of the Customer number range interval.
4 . Ext: Select EXT box if you want External numbering
Step 7: Select Save and ignore the warning message. Press enter.


